Rock Star Camp Day 3: Glitter, Glitter, Everywhere

Read more about our camp here!

Day #3 Set List

  • Warm-Up:  Jazz warm-up and across the floor progressions
  • Class Time:  Jazz class – learn dance #3
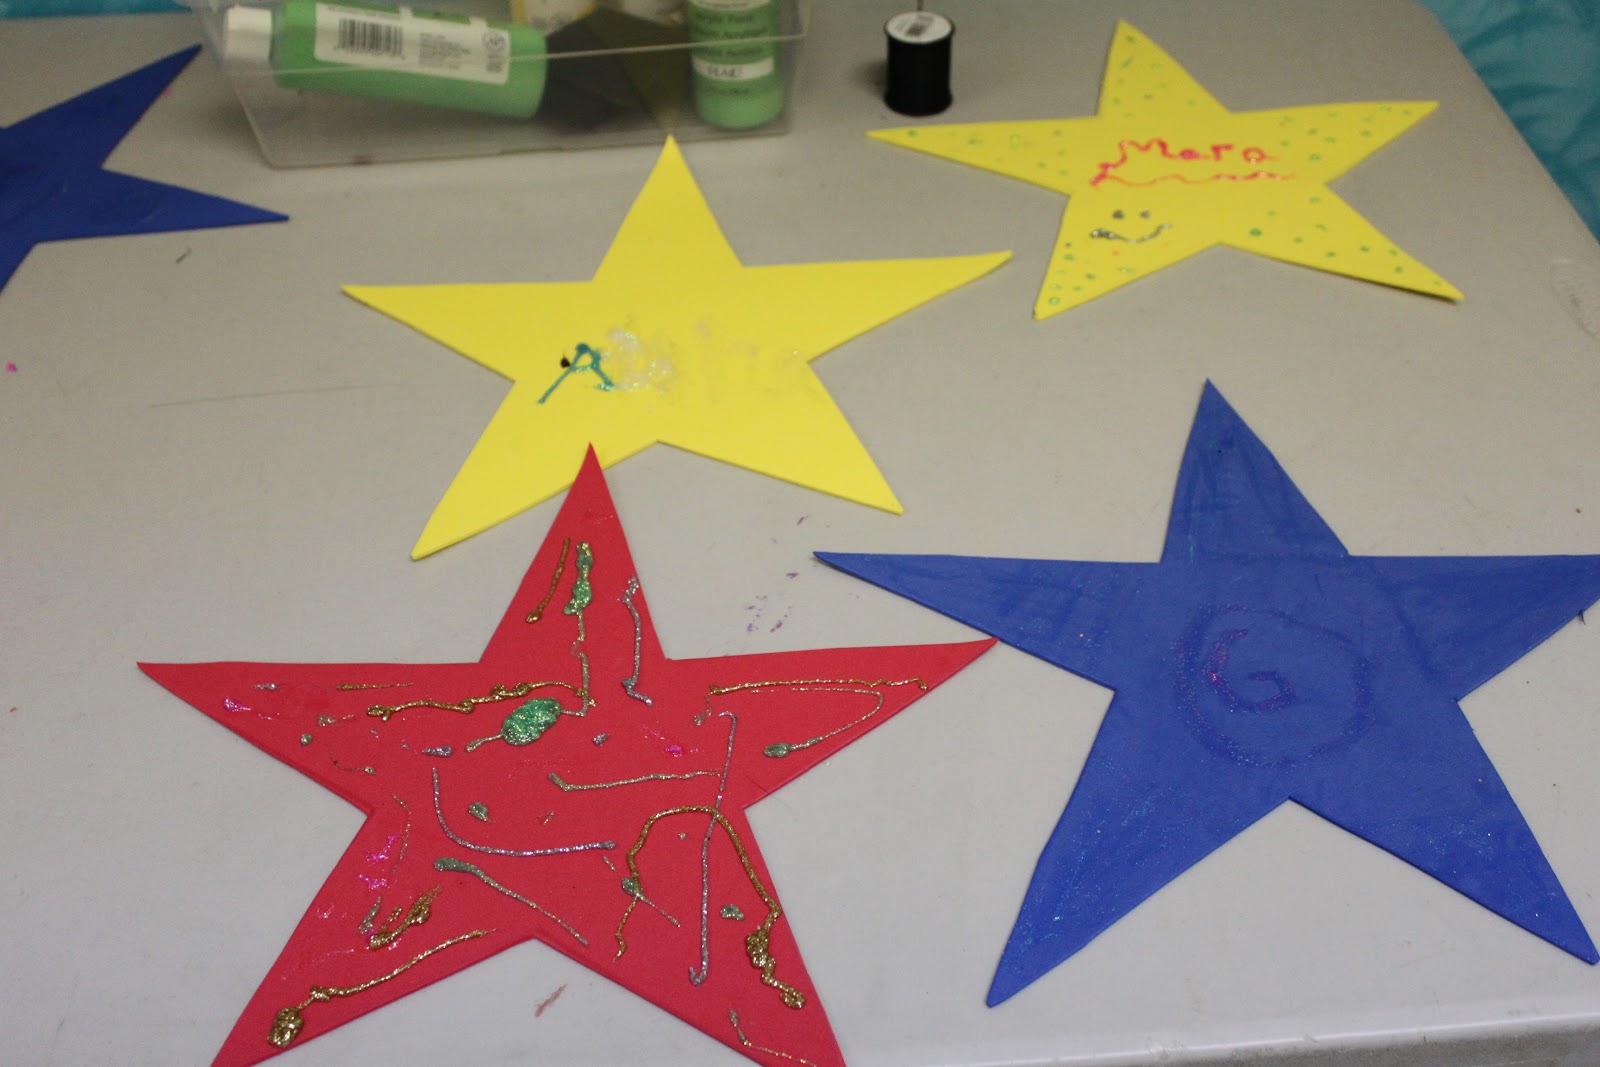
  • Craft Time:  Microphones, Picture Frames, Stars
  • Snack
  • Class Time:  Tap class – learn dance #3
  • Fun Time:  Alphadance
Playlist
For Day 3, we lip-synced with our microphones to “Rock Around The Clock” Rock Around the Clock - Rock Around the Clock  and did a fun jazz dance to Little Richard’s rockin’ version of “Itsy Bitsy Spider”Itsy Bitsy Spider - Every Child Deserves a Lifetime

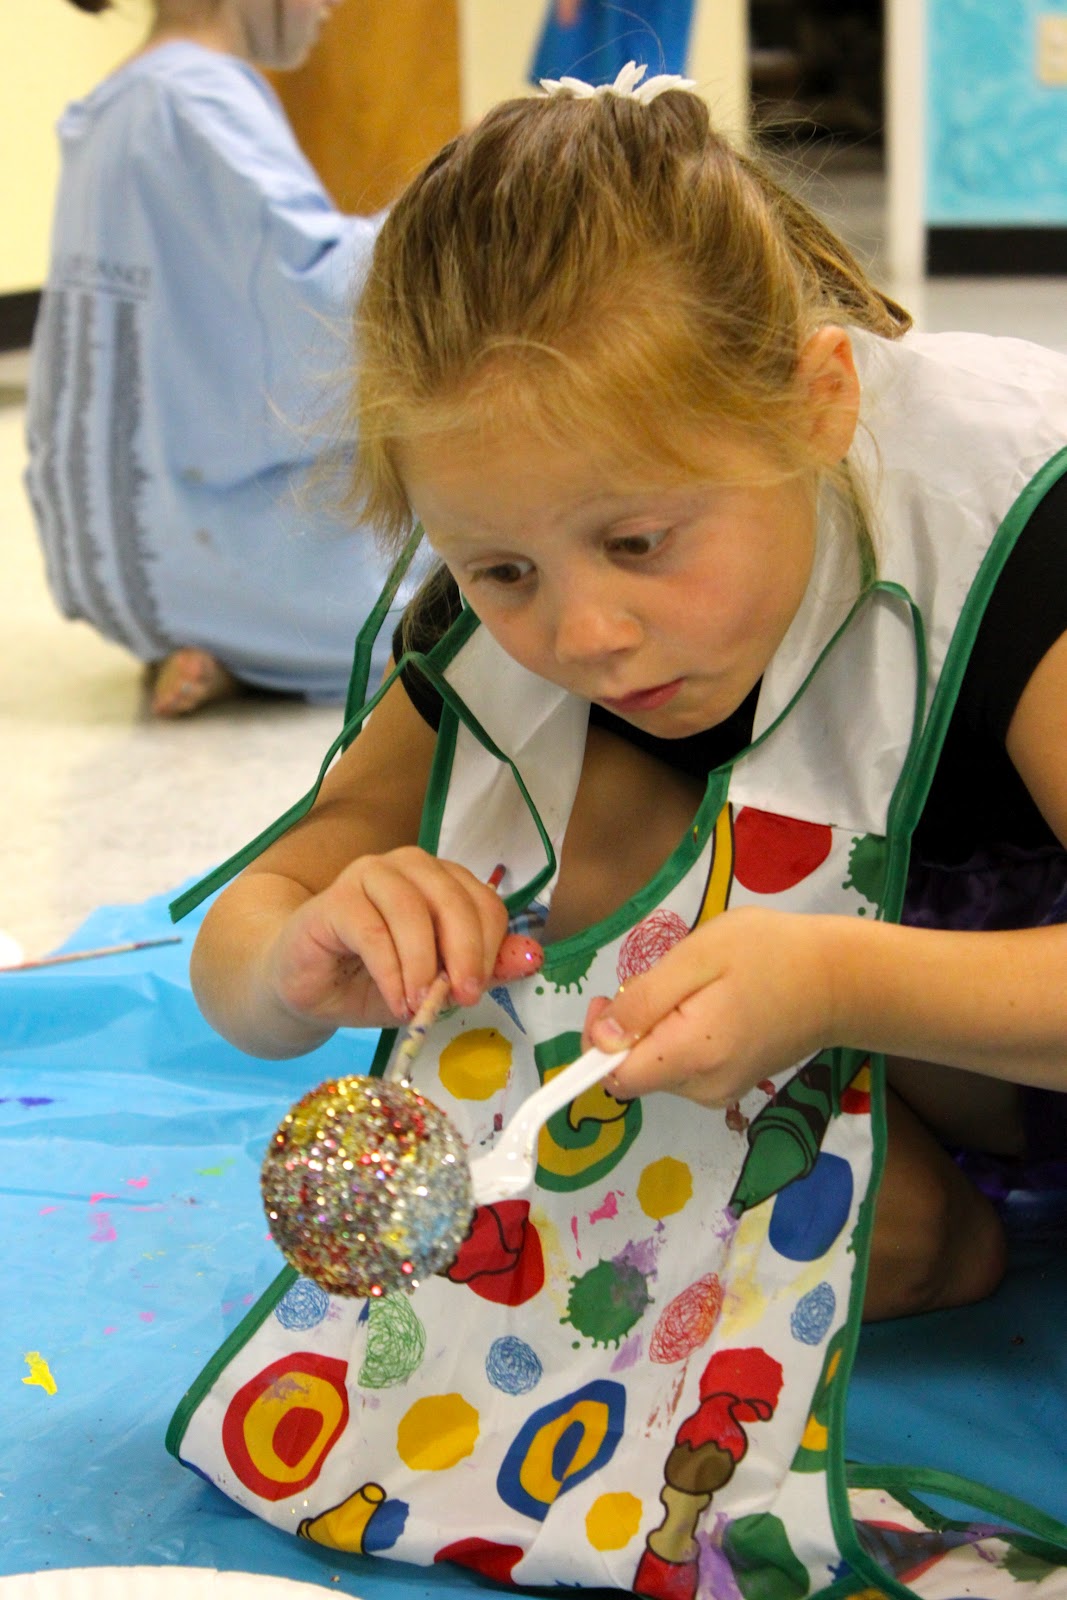
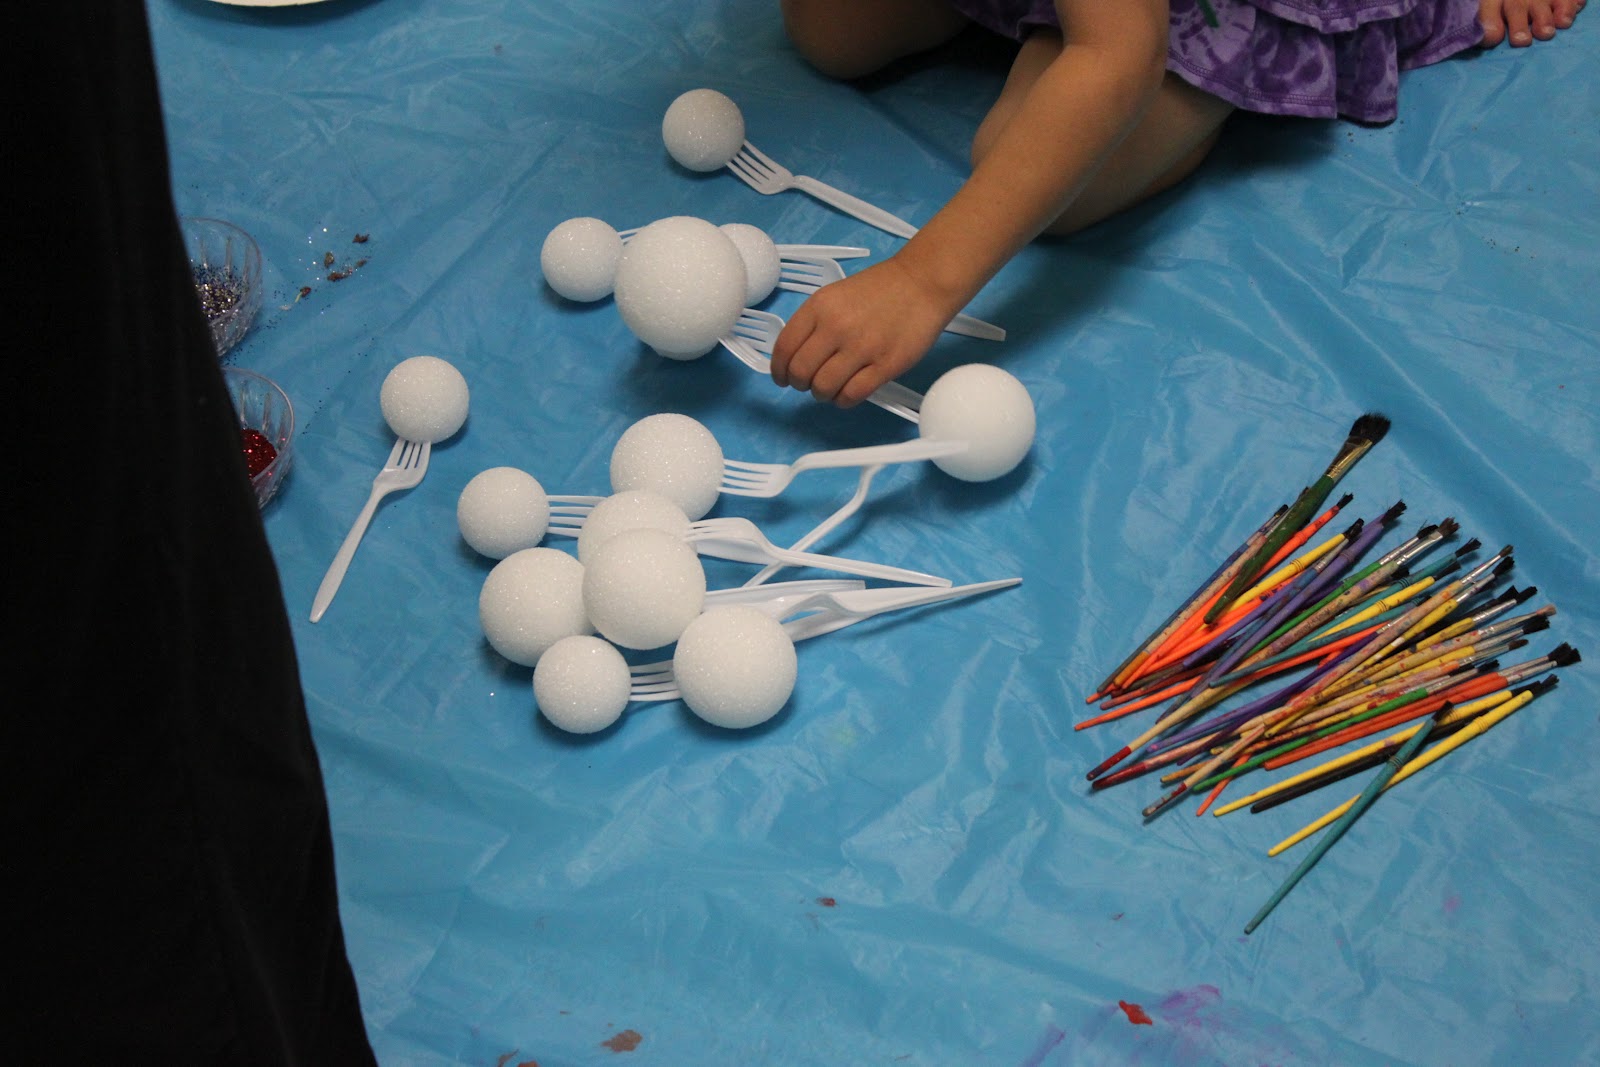
Main Craft: Glittered Microphone Heads
Supplies Needed:  Styrofoam balls, glue, paintbrushes, glitter, hot glue, painted tube from Day 2

1)  Apply glue to styrofoam balls with paintbrushes (we put the balls on a fork to make “glitterizing” easier).

2) Dip in glitter and repeat until covered. Set aside to dry.

3) *Teacher Step* Hot glue glittered styrofoam to painted tube (from yesterday’s step).


Microphones and guitar necks drying.

Our forks wouldn’t fit in the small tubes so we let them

dry in the guitar necks.


Craft #2: Picture Frames
Supplies:  foam sheets, foam stickers, hot glue, photos

Continue reading

Rock Star Camp Day 2: Rockin’ Guitars & Hats

See more about our camps here – Rock Star Theme Camp.  

Day #2 Set List

  • Warm-Up:  Jazz warm-up and across the floor progressions
  • Class Time:  Jazz class – learn dance #2
  • Craft Time:  Guitars, Hats, Microphones
  • Snack
  • Class Time:  Tap class – learn dance #2
  • Fun Time:  Limbo & Beanbag pass
Microphone bases (left) and guitar necks (right)

Main Craft: Guitars

You Will Need:
– Various cardboard boxes (tissue boxes, shoe boxes, pasta boxes, etc) – 1 per guitar
– 1-foot piece of cardboard tube (wrapping paper or paper towel tube) – 1 per guitar
– Construction or contact paper to cover box
– Rubber bands (6 per guitar)
– Crayons (2 per guitar)
– Paint & paint brushes
– Hot glue gun
– Glue sticks for glue gun

1.  Paint cardboard tube.  Set aside to dry.

Continue reading

Rock Star Camp Day 1: Tie-Dye

.See more about our camps here – Rock Star Theme Camp.

Day #1 Set List

  • Warm-Up:  Creative Movement in center & across the floor
  • Jazz Class:  Learn Jazz Dance #1
  • Craft Time:  Tie-Dye T-Shirts & VIP Passes
  • Snack
  • Tap Class: Learn Tap Dance #1
  • Game Time: Obstacle Course & Freeze Dance

Main Craft: Tie-Dye T-shirts
You Will Need:
– T-Shirts
Fabric Dye (pink, yellow, blue, purple)
– Buckets
– Rubberbands

We keep it basic and mix up 4 or 5 different buckets of fabric dye outside the studio (we have a sidewalk with a faucet, which works perfectly).  The kids design the t-shirts inside with rubberbands.  If you want design ideas, here are a few good tutorials.   

We skip the soda ash step and just let the kids dip in the buckets. The shirts end up pastel, but it works for us and keeps it simple.  Once the kids are done dipping, we rinse the shirts out under the outside faucet, unwrap them and hang them up to dry.

Tip #1:  Some kids will want to use one or two colors, others will need to dip in every bucket.  For this reason, avoid darker colors like maroon, navy blue and hunter green – mixing will result in a brown t-shirt!  I recommend at least getting red, yellow, purple and bright blue.

Tip #2: The tie-dye will stain skin and dancewear / shoes.  Our kids bring smocks, but inevitably someone splashes and ends up with polka-dot tights.  In our welcome letter I let parents know we will be tie-dying on the first day in case they don’t want to wear their “fancy outfit”.  We tie-dye in bare feet and with our smocks on to avoid most of the mess.

Continue reading